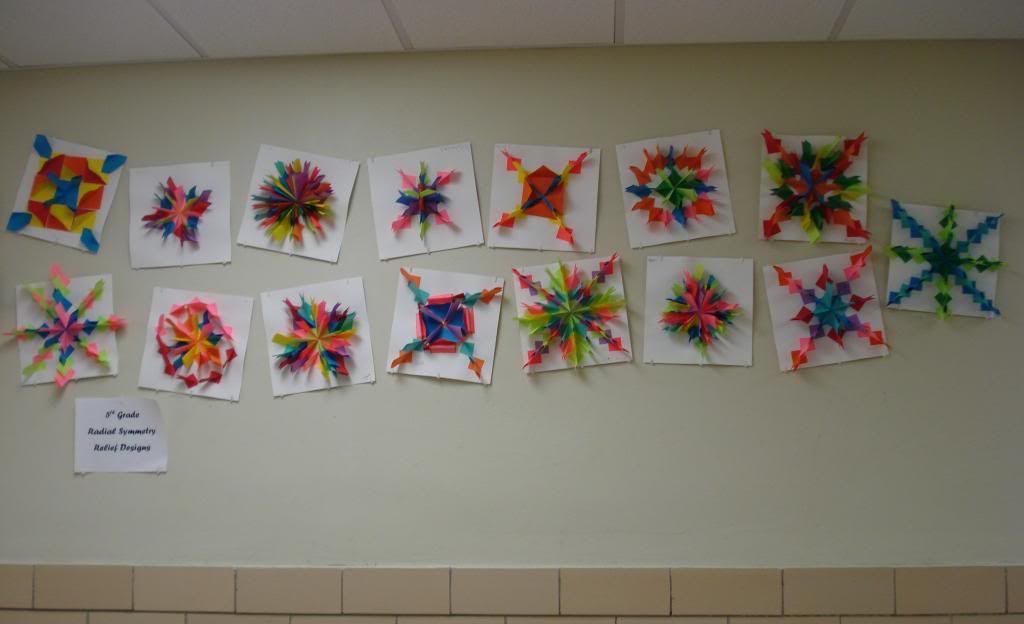
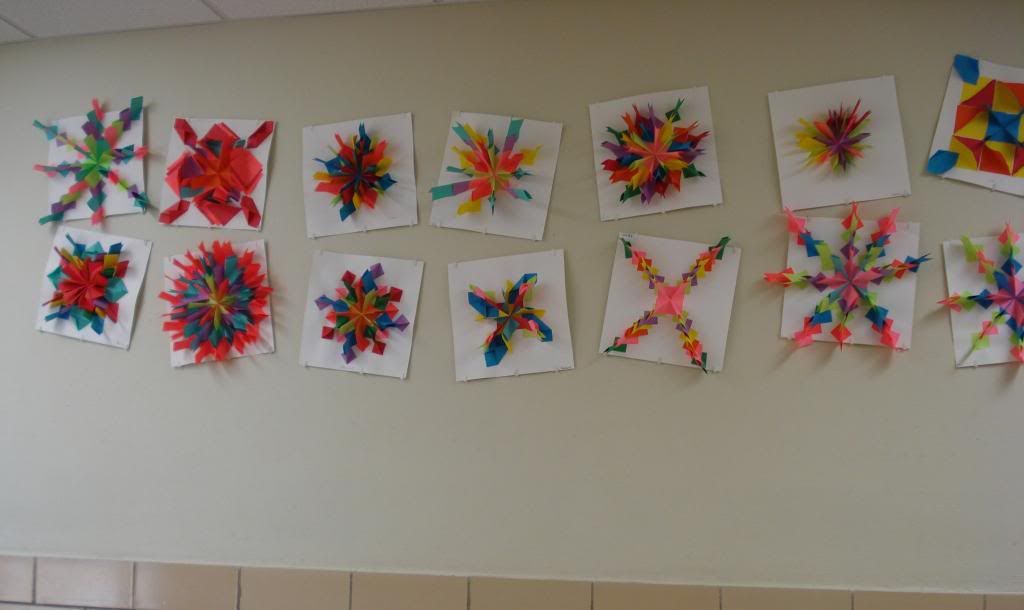
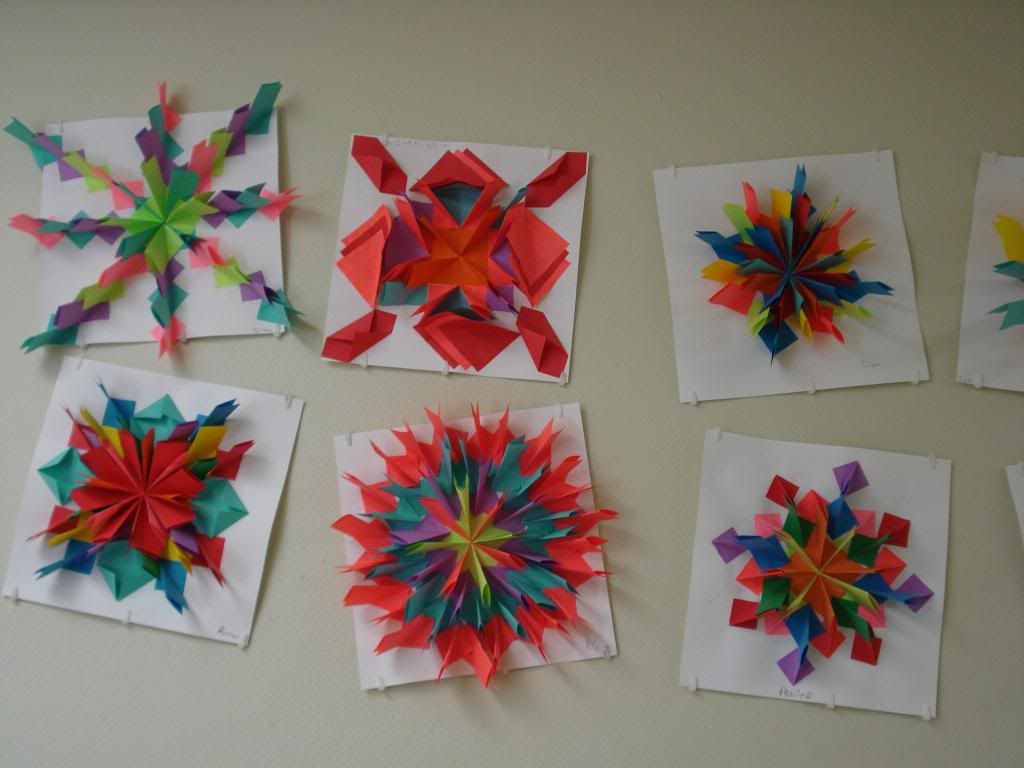
Just last week my 5th graders finished up a 3 week project. The results were fabulous!!!
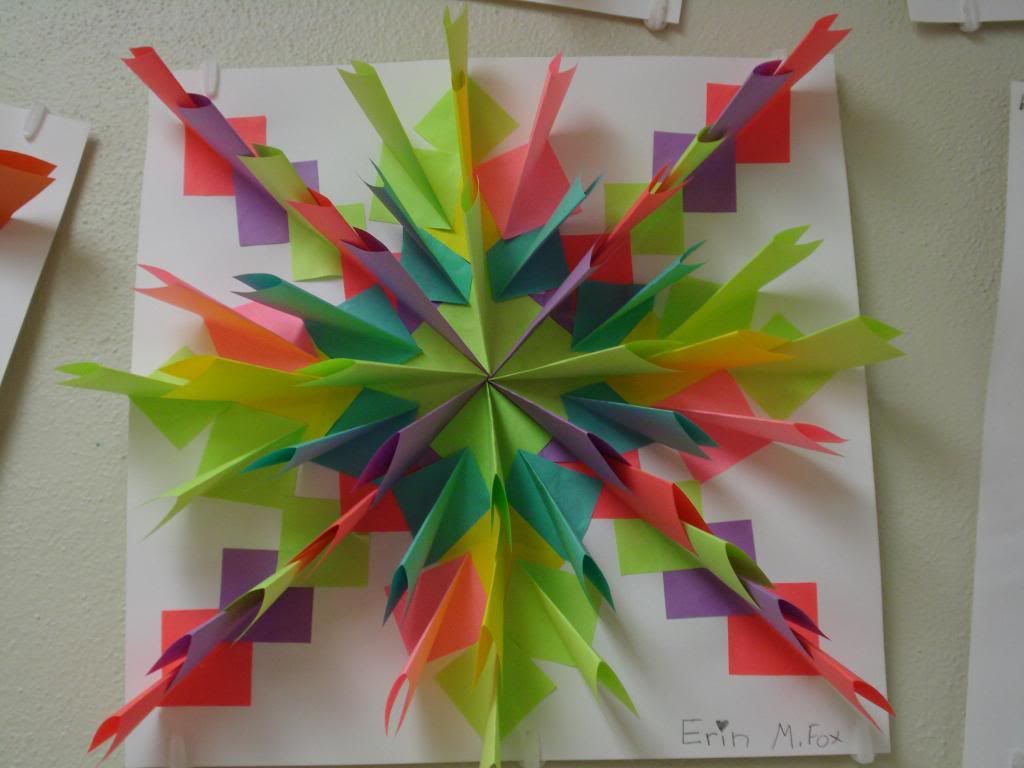
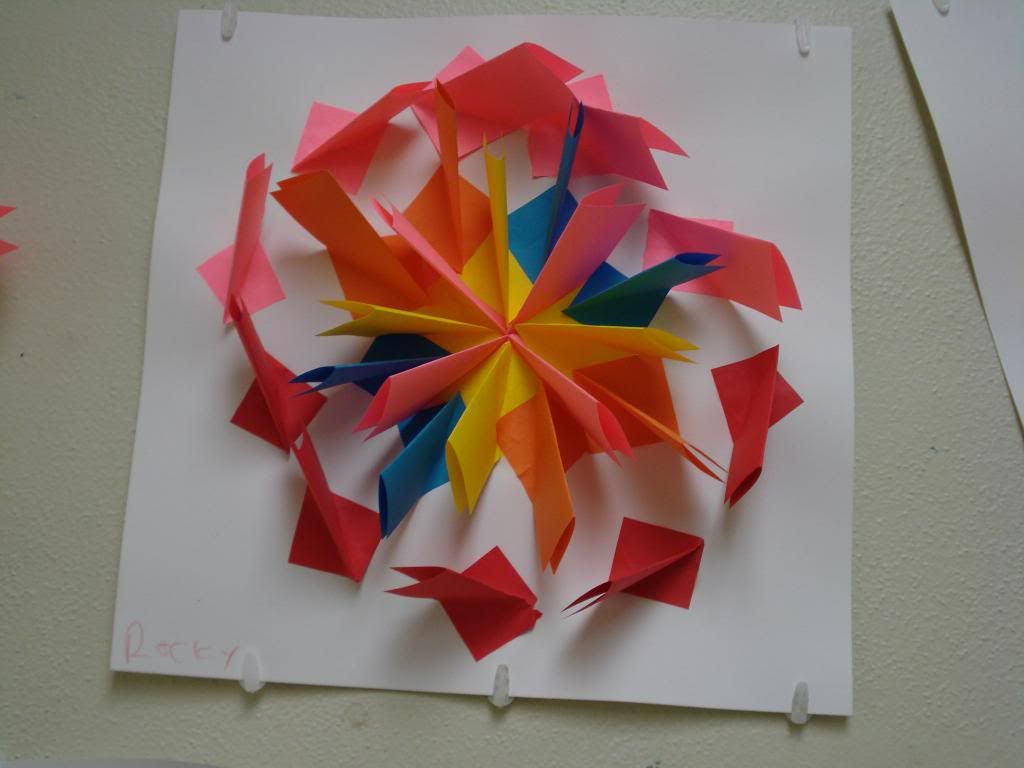
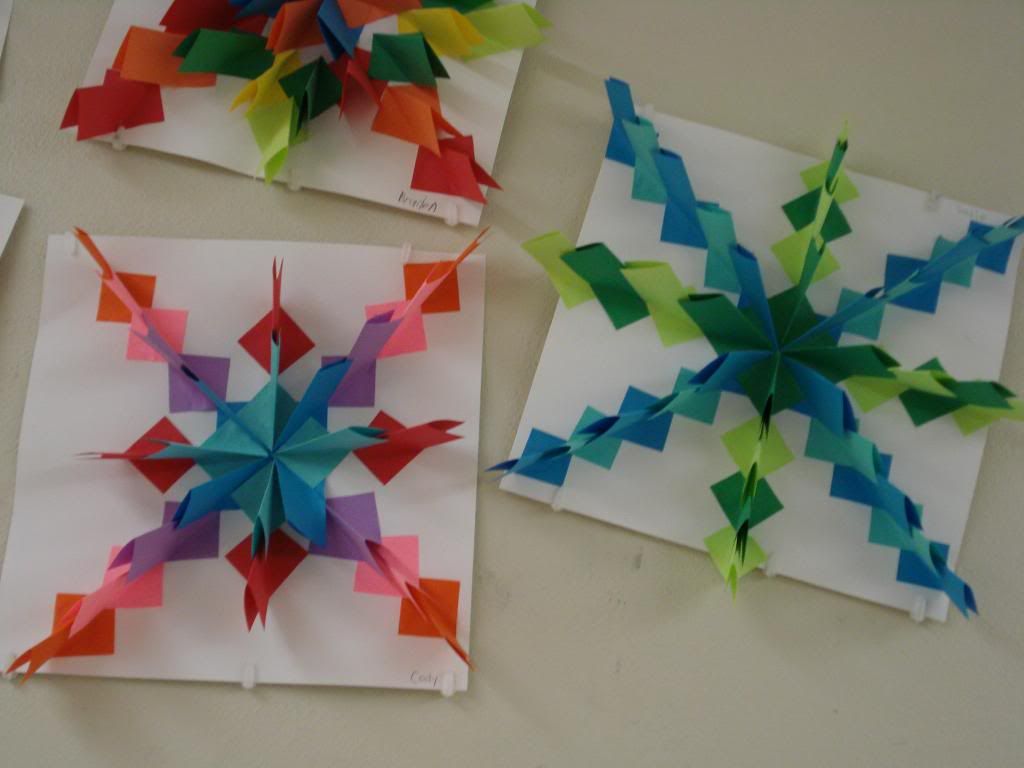
Using the idea of symmetry, my 5th graders found the middle of a 12 inch white paper square and made a plus mark indicating the center. From there we started folding our paper and gluing, repeating each folded paper 4 times to create symmetry. I've seen similar projects like this before and the fold is described as a dart, my students described it as an upside down paper airplane. I can see the reason why they said this. The idea is that each folded paper can fit inside another.
I did not make my students stack the colored papers inside each other. I allowed them to have creative freedom as long as their designs showed symmetry. I "borrowed" colored copy paper from the office for this project because it is thinner and allows for easier, tighter folds. Plus, they have a variety of bright and bold colors I knew the students would love. Each colored square is 3 inches.
I love how each one is a little different but still is great!
Here are some results:
Love this. Very cool. Did you have the paper cut down into small sections for the students to work with?
ReplyDeleteI cut all of the colored paper squares to 3X3 ready for my students to fold and glue. I have some scraps/squares leftover that I already have an idea for with my Kindergarten tomorrow! The white paper is 12X12. I think any size would work depending how much time you want to spend on it. The only difficult thing was storing them (they do not stack very well) and having to hang them in the hall high enough that nobody could touch them because they look so cool I figured hands would gravitate toward them. The smaller the square, the less they will stick out. I think a little smaller would work just fine as well. It was a really fun project! Even my JH students saw them laying around the room and thought they were pretty awesome! :)
ReplyDeleteThese looks so complex! Did the students do any preparatory planning? Did you show them a powerpoint or anything on symmetry? Were all of your students able to understand how to construct all the pieces so they were the same on all sides? I feel like a lot of my students would have difficulty understanding this concept. (Althought I think the lesson is fabulous!)
ReplyDeleteIt looks more complex than it really is! I have done symmetry before with these students, so this was kind of a review concept. I had all of the colored squares at a table where they had to go choose what color they wanted. When they did this they could only choose one color at a time and worked in 4's. Finding the middle of the paper to separate the sections was helpful as a starting point. After that I let them have free reign as long as what they did in one section with a color they repeated 4 times all together. They caught on pretty fast! I had some variations in the folding, etc. that I wasn't expecting but they turned out to be fun surprises!
DeleteThese are awesome looking!
ReplyDeleteHow did you create the dart fold?
ReplyDeleteHow did you create the dart fold? These are stellar! I've been looking at them but I cannot figure out how you folded the squares!
ReplyDeleteFold the square in half and then on one side fold each corner separately toward the creased side. It looks similar to a paper airplane. Once the fold is created, holding the paper together tightly, the area where you put glue looks like a diamond with a line down the middle. I wish I would have taken photos of the folding because it would be much easier to explain with pictures! Perhaps next time! Hope this helps!
ReplyDeletehow do you make this
ReplyDeletehow do you them?
ReplyDelete